




The "Can't connect to this network" error is a common Windows issue that prevents your PC from connecting to Wi-Fi or other wireless networks. It is often caused by outdated network drivers, incorrect adapter settings, corrupted network configurations, or Windows system issues. In this guide, we'll walk you through proven solutions to fix the "Can't connect to this network" error, starting with updating your network drivers to restore a stable and reliable internet connection.
Windows Network Reset and Configuration
These steps address internal conflicts within Windows' network protocols and settings.
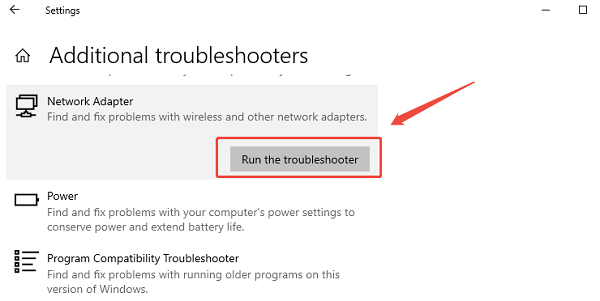
Method 1: Run the Network Adapter Troubleshooter
Windows has a built-in tool that can automatically detect and fix many common adapter and connection issues.
Press Windows Key + I to open Settings.
Go to "Update & Security" (Windows 10) or "System" > "Troubleshoot" (Windows 11).
Select "Additional troubleshooters" (or "Other troubleshooters").
Run the troubleshooter for the "Network Adapter" and follow the on-screen prompts. Windows will attempt to fix the problem automatically.
Method 2: Reset TCP/IP and Renew IP Configuration
Corrupted IP settings and protocols are a frequent cause of connection failures. A command-line reset can often clear these conflicts.
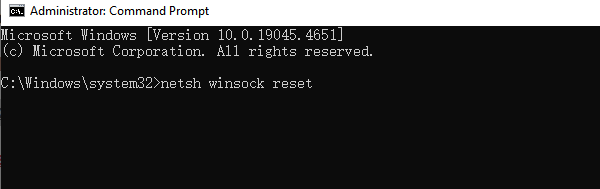
1). Open Command Prompt as Administrator (Win + R > type "cmd" > right-click and choose "Run as administrator").
2). Run the following commands one by one, pressing Enter after each:
netsh winsock reset
netsh int ip reset
ipconfig /release
ipconfig /renew
Restart your PC to finalize the reset of the network stack.
Network Driver Integrity and Stability
The network adapter requires a stable, up-to-date driver to communicate correctly with the wireless router and the Windows operating system. An outdated driver is the most common cause of intermittent connection failures.
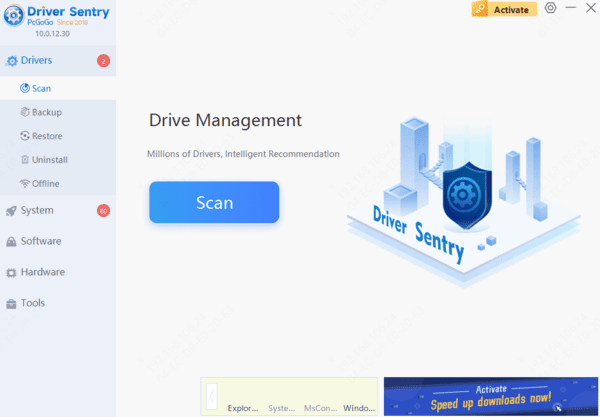
Automated Driver Update with Driver Sentry
Manually troubleshooting and updating the various network drivers (Wi-Fi adapter, Ethernet controller, and motherboard chipset) can be complex, especially if you lack an internet connection to search for files. A specialized utility automates this entire process, ensuring stable and compatible network hardware.

Adapter Management and Physical Checks
These solutions address the hardware status and connection stability of the network adapter.
Method 1: Manually Reset the Network Adapter
Disabling and re-enabling the adapter can clear temporary glitches without requiring a full system restart.
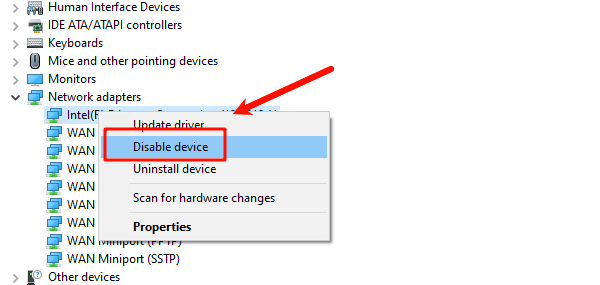
Press Windows Key + X and select "Device Manager".
Expand the "Network adapters" category.
Right-click on your Wi-Fi or Ethernet adapter (e.g., Intel Dual Band Wireless-AC).
Select "Disable device".
Wait for 10 seconds.
Right-click the adapter again and select "Enable device".
Method 2: Forget the Network and Re-Enter Password
If the network connection worked previously but failed after a password change, Windows may be holding onto the wrong credentials.
Click the Network icon (Wi-Fi/Ethernet) in the taskbar.
Click "Network & Internet Settings" (or "Properties" for the connected network).
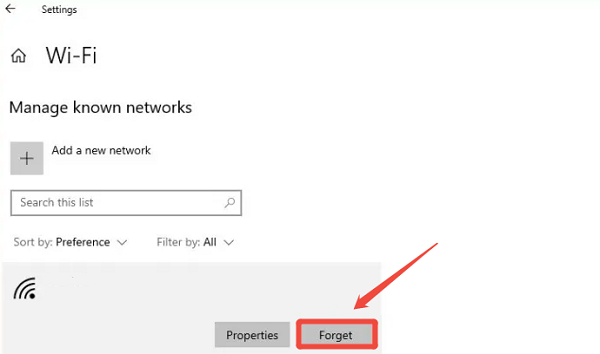
Find the option to "Manage known networks" (or "Wi-Fi" section).
Select the network name you cannot connect to and click "Forget".
Attempt to connect again and carefully re-enter the password.
The "Can't connect to this network" error is highly fixable by addressing conflicts at the driver and software levels. The most reliable way is ensuring network adapter driver stability with Driver Sentry. By combining this with running the Windows Network Adapter Troubleshooter and performing a TCP/IP reset, you can systematically eliminate software conflicts and quickly restore your internet connection.