




Nothing is more frustrating than sitting down at your computer and finding that no Wi-Fi networks are showing up. This issue can occur on Windows 10, Windows 11, and older versions, preventing you from connecting to the internet. In this guide, we'll cover effective ways to fix the "Wi-Fi networks not showing up on PC" issue.
Method 1: Update Wi-Fi Drivers with Driver Sentry (Recommended)
Outdated or corrupted Wi-Fi drivers are the most common cause of networks not showing up on your PC. Driver Sentry makes it simple to detect and update the correct drivers safely.
Download and Install Driver Sentry:
Click the "Download" button to download and install it on your PC.
Open the program. Click the "Scan" button.
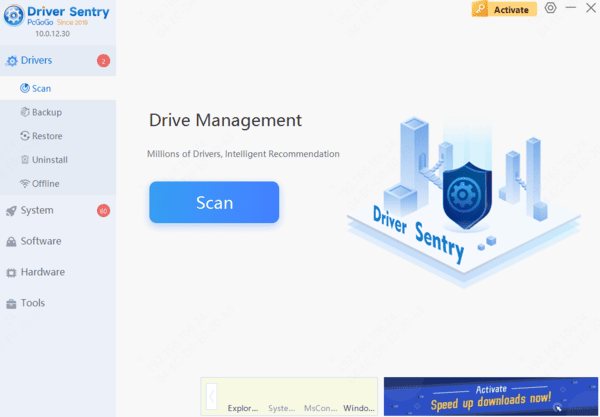
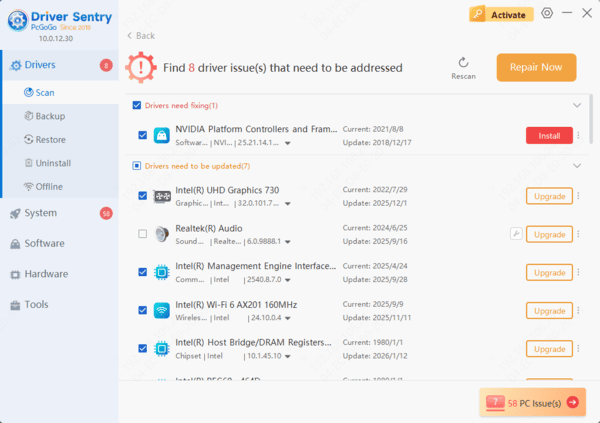
Driver Sentry will detect your Wi-Fi adapter and show whether the driver is outdated or corrupted.
Update the Driver:
Locate your Wi-Fi or network adapter driver in the results.
Click "Upgrade" to download and install the latest driver version.
Restart Your PC:
Reboot your computer so the new driver can take effect.
Tip: Driver Sentry also allows you to back up drivers before updating, ensuring you can roll back if necessary.
Method 2: Check if Wi-Fi is Enabled
Sometimes the problem is not with drivers, but with your Wi-Fi being turned off.
Steps:
Press Win + I to open Settings.
Go to "Network & Internet" > "Wi-Fi".
Make sure the Wi-Fi toggle is set to On.
On laptops, also check the Wi-Fi key (often Fn + F2 or a dedicated switch).
Method 3: Run the Windows Network Troubleshooter
Windows has a built-in tool to diagnose connectivity issues.
Steps:
Press Win + I and go to Settings.
Select "Update & Security" > "Troubleshoot".
Click "Additional troubleshooters".
Choose "Internet Connections" > "Run the troubleshooter".
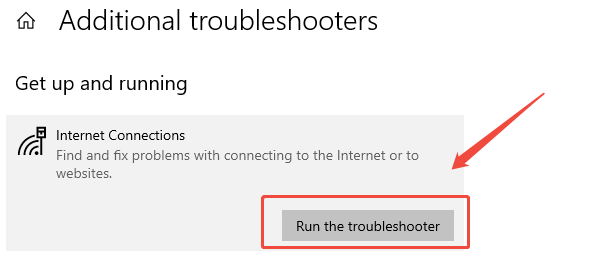
Follow the on-screen instructions to detect and fix problems.
Method 4: Restart Your Network Services
If Wi-Fi services are disabled, networks may not appear.
Steps:
Press Win + R, type "services.msc", and hit Enter.
In the Services window, locate these services:
WLAN AutoConfig
Network Connections
DHCP Client
Right-click each one and choose "Restart".
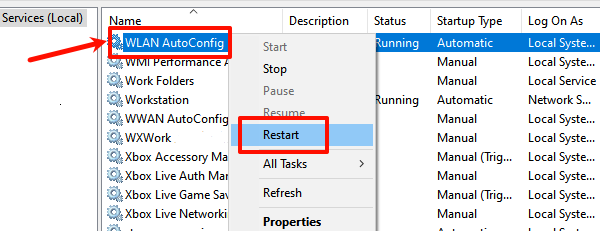
Set their Startup Type to Automatic.
Method 5: Reset Network Settings
If nothing works, resetting your network stack may resolve the problem.
Steps:
Press Win + I and go to "Network & Internet".
Scroll down and click "Network reset".
Click "Reset now" and confirm.
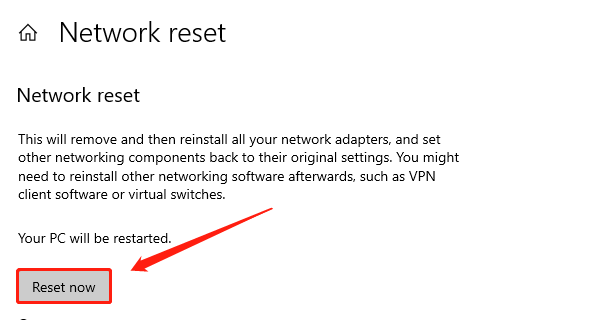
Your PC will restart, and you'll need to reconnect to your Wi-Fi.
Method 6: Manually Reinstall the Wi-Fi Adapter Driver
If updating didn't help, reinstalling the driver might.
Steps:
Press Win + X and select Device Manager.
Expand "Network adapters". Right-click your Wi-Fi adapter and select "Uninstall device".
Restart your PC. Windows will reinstall the driver automatically.
Conclusion
When your Wi-Fi networks are not showing up on your PC, the issue usually comes down to disabled Wi-Fi, incorrect settings, or outdated drivers. By following the methods in this guide, you should be able to restore your Wi-Fi connection quickly and get back online without hassle.