



A stable internet connection is essential for work, gaming, and everyday online activities. However, many Windows 11 users may encounter network problems, such as WiFi not connecting, no internet access, or network adapters not working properly. These issues can be caused by incorrect settings, outdated drivers, router problems, or system conflicts. In this guide, we'll show you several effective ways to fix network problems in Windows 11 and help restore your internet connection quickly.
Method 1: Check Router Settings
Log into the router's admin interface and check the settings to ensure everything is configured correctly.
Method 2: Restart Your Device and Router
Long periods of usage can cause your computer or router to experience performance issues or accumulate too much cached data. Restarting your devices can often resolve these problems. Start by restarting your computer, and if that doesn't work, try rebooting your router. After a few minutes, reconnect to the WiFi and see if the problem is resolved.
Method 3: Update Drivers
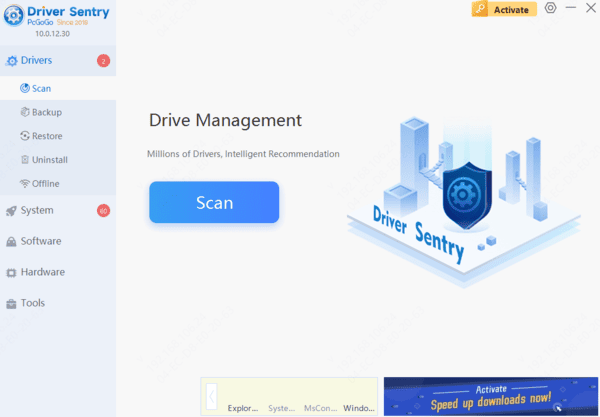
Sometimes, network issues can be caused by outdated or faulty drivers. An operating system update might cause older drivers to become incompatible with the new system, which can interfere with your network connection. To easily check and update your drivers, you can use "Driver Sentry", a tool that scans and updates drivers automatically, ensuring they are up to date.
Method 4: Check Network Adapter
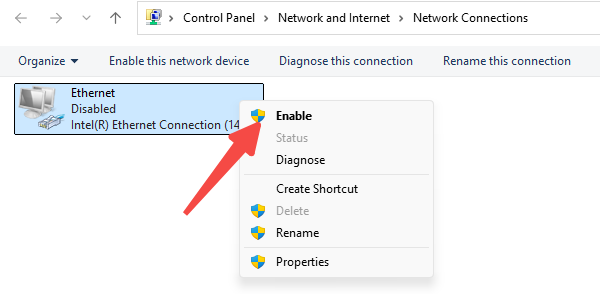
Your computer's network adapter is the bridge to the internet, so it's important to make sure it's enabled. Here's how to check:
1. Open the "Control Panel" and select "Network and Internet".
2. Go to "Network and Sharing Center" and click on "Change adapter settings".
3. Check if your network connection is enabled. If it's disabled, right-click on it and select "Enable".
Method 5: Check IP Settings
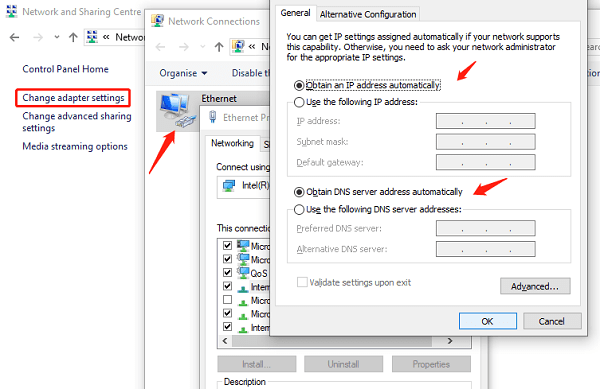
Sometimes, incorrect IP address settings can prevent your computer from connecting to the internet. You can manually check and adjust your IP settings by following these steps:
1. Open the "Control Panel" and choose "Network and Internet".
2. Go to "Network and Sharing Center" and click on "Change adapter settings".
3. Right-click the connected network adapter and select "Properties".
4. Under "This connection uses the following items", find "Internet Protocol Version 4 (TCP/IPv4)" and double-click it.
5. Ensure that "Obtain an IP address automatically" and "Obtain DNS server address automatically" are both selected.
Method 6: Check Firewall and Security Software
Sometimes, your firewall or security software can block internet access. Certain firewalls may mistakenly identify network connections as a security threat, preventing access.
1. Open the "Control Panel", click "System and Security", and select "Windows Defender Firewall".
2. Choose "Turn Windows Defender Firewall on or off" and select "Turn off Windows Firewall".
3. After disabling the firewall, try connecting to the internet. If the connection works, the firewall settings were likely the issue, and you may need to adjust the firewall rules.
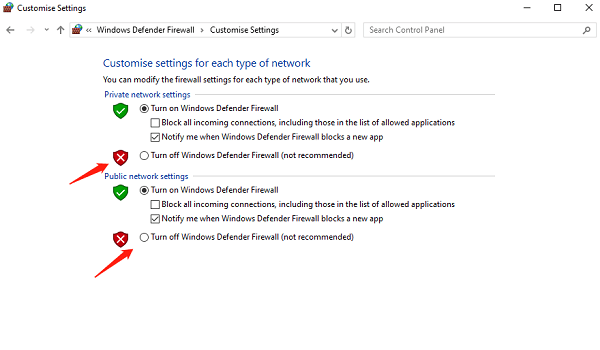
If you're using third-party security software (such as antivirus or security suites), try disabling or uninstalling it to see if that resolves the connection issue.
We hope these tips help you quickly solve the problem of "My computer can't connect to the internet, but others can". If you encounter any driver-related issues, "Driver Sentry" can assist in easily detecting and fixing them.
See also:
6 Methods to Improve Network Connection Stability
How to Quickly Fix Network Adapter Issues in Windows
How to Download and Install Wireless Network Card Drivers
Why my laptop is not connecting to mobile hotspot windows 11