





Blue Screen of Death (BSOD) errors are a common problem for Windows 10 users and can cause unexpected crashes, restarts, and potential data loss. These errors are often related to driver problems, corrupted system files, hardware conflicts, or recent system changes. In this guide, we'll provide several effective solutions to troubleshoot and fix Windows 10 BSOD errors, helping you restore system stability and get your PC running normally again.
1. Shut Down and Disconnect
Use Ctrl + Shift + Esc to open Task Manager, and end any unresponsive programs.
Unplug external devices from your computer, such as USB drives, printers, or external monitors, as some devices or cables can cause system conflicts or instability.
Right-click the Start button and select "Restart", or hold down the power button to force a shutdown and then restart the computer.
2. Update Drivers
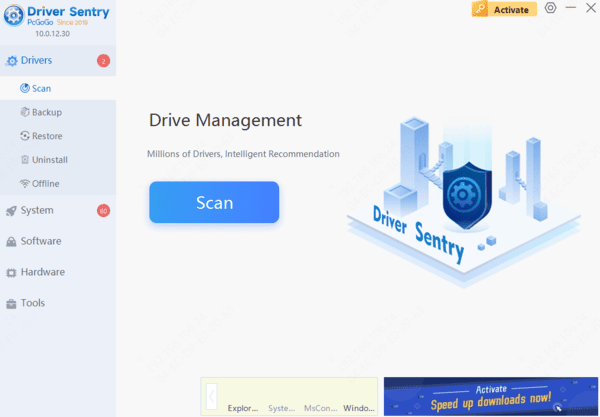
Outdated or incompatible drivers are a common cause of blue screen errors in Windows. Updating your graphics driver can effectively prevent such issues. Driver Sentry is recommended for automatic driver updates, saving time and reducing the risk of installing incorrect drivers.
3. Restart in Safe Mode
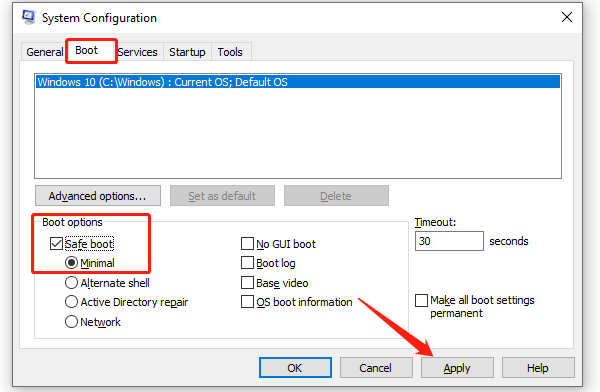
Press Win + R to open the Run dialog, type "msconfig", and press Enter.
In the "System Configuration" window, go to the "Boot" tab and check the "Safe boot" option.
Select "Minimal" for basic Safe Mode and click "OK".
4. Run the System File Checker Tool
In the search box, type "Command Prompt", right-click it, and choose "Run as administrator".
In the Command Prompt, type the following command and press Enter: sfc /scannow
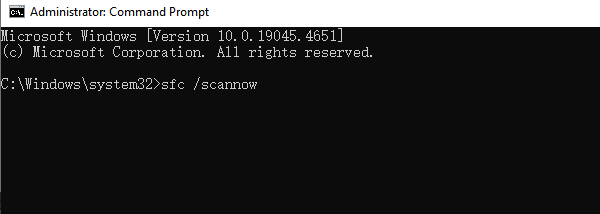
The system will begin scanning and repairing files, which may take several minutes.
Once complete, restart your computer to apply the repairs.
5. Uninstall Recently Installed Software
Go to "Settings" > "Apps" > "Apps & features".
Locate and select any recently installed applications.
Click "Uninstall" and follow the prompts to complete the process.
Restart your computer to see if the issue is resolved.
6. Scan the Hard Drive
Open "This PC", right-click the system drive (usually C:), and select "Properties".
In the "Tools" tab, click "Check" to scan for any errors on the hard drive.
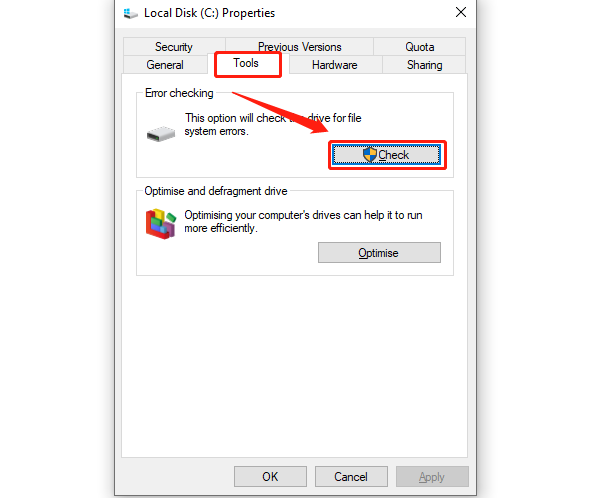
If errors are found, you'll be prompted to repair the drive. Choose "Repair drive" and wait for the process to complete.
Restart your computer to see if the problem has been resolved.
7. Run the Memory Diagnostic Tool
Press Win + R, type "mdsched.exe", and press Enter.
Choose "Restart now and check for problems". Your computer will restart and run the memory diagnostic.
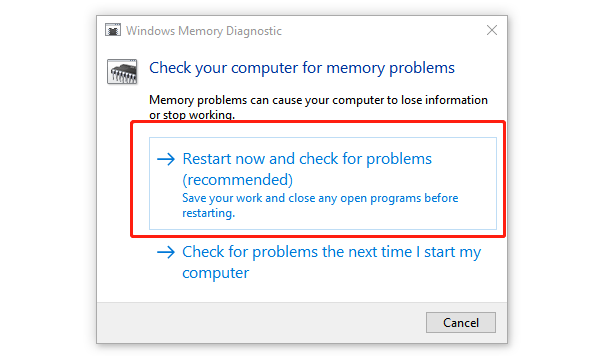
The process will automatically complete, and the results will be displayed. If any memory issues are found, consider replacing or repairing the memory modules.
8. Perform a System Restore
Press Win + S, search for "Recovery", and select "Recovery".
In the Recovery window, select "Open System Restore".
Choose a restore point (preferably one from before the issue began) and click "Next".
Follow the prompts to complete the system restore. Your system will automatically restart and return to the selected restore point.
After the restore, check if the issue has been resolved.