




Have you ever been in a situation where you urgently need internet on your laptop, but it fails to detect any WiFi networks? It can be extremely frustrating when you can't check emails, stream content, or browse the web. If you're facing the “laptop not detecting WiFi” issue, don't worry—this is a common problem and can usually be fixed with a few simple troubleshooting steps. In this guide, we'll walk you through practical solutions to help restore your WiFi connection quickly and get you back online.
1. Check Your WiFi Network
-Open the "Settings" app. You can usually find it by clicking the Start button and looking for the gear-shaped icon.
-Select "Network & Internet".
-On the left-hand side, click on "Airplane mode".
-On the right-hand side, flip the switch to turn Airplane Mode off.
2. Check the Required Services
-Press the Windows key and the R key at the same time. This will open the "Run" dialog box.
-Type "services.msc" and press Enter. This will open the "Services" window.
-Look for services like "Remote Procedure Call (RPC)", "Windows EventLog", and "Windows Update". Check their status. If a service isn't running, right-click on it and select "Start".
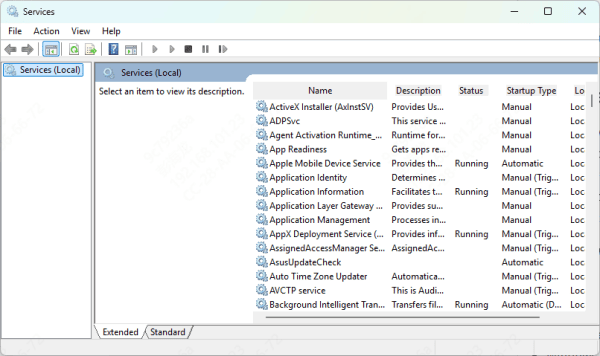
-You can also configure the startup type of some services. For example:
-Set "Windows Event Log" to "Automatic".
-Set "Windows Update" to "Manual".
-Set "Wlan AutoConfig" to "Automatic".
-Set "Network List Service" to "Manual".
-Set "Network Location Awareness" to "Automatic".
-Set "Radio Management Service" to "Manual".
3. Run the Network Troubleshooter
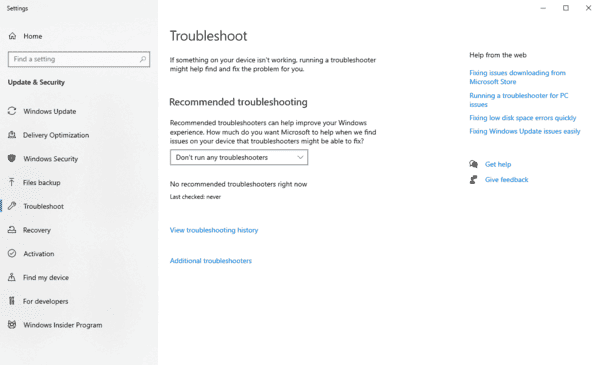
Windows has a built-in network troubleshooter that can often fix the "laptop not detecting WiFi" problem. Here's how to use it:
-Open the "Settings" app.
-Select "Network & Internet".
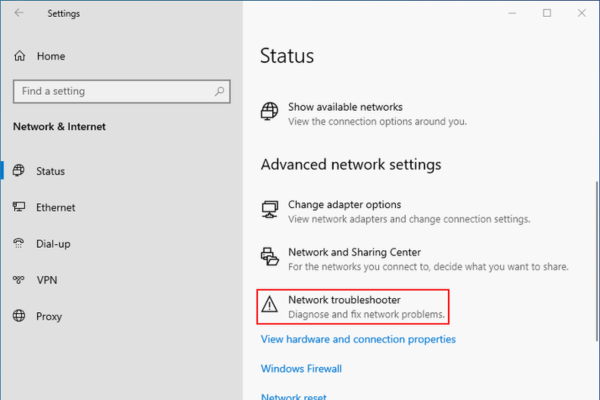
-Scroll down and find the "Advanced network settings" section.
-Click on "Network troubleshooter".
-Follow the on-screen instructions. The troubleshooter will scan your network settings and try to fix any issues it finds.
4. Update Your WiFi Driver
An outdated WiFi driver can cause all sorts of problems, including your laptop not detecting the WiFi network. To update your WiFi driver:
-Open the "Device Manager". You are able to achieve this by performing a right-click on the Start button and then choosing "Device Manager".
-Expand the "Network adapters" section.
-Right-click on your WiFi adapter and select "Update driver".
-Follow the on-screen instructions to complete the update.
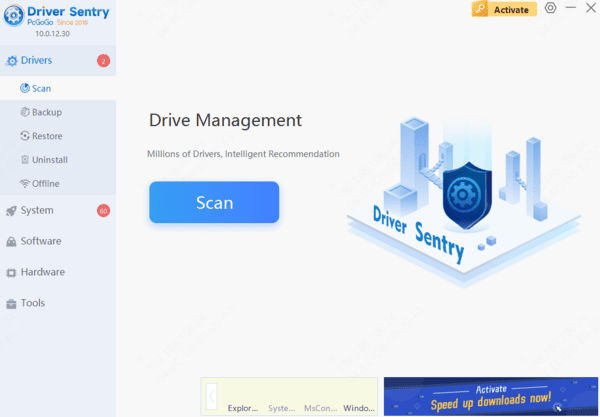
If you're not comfortable updating the driver manually, you can use PcGoGo Driver Sentry. PcGoGo Driver Sentry is a great tool that can automatically scan your system for outdated drivers, including your WiFi driver. It then downloads and installs the latest and compatible drivers for you. Here's how to use it:
-Download and install it first.
-Open the software and click the "Scan" button. PcGoGo Driver Sentry will quickly scan your computer to identify any driver issues.
-After the scan, look for the WiFi driver in the list of detected problems. Click the "Update" button next to it.
-Driver Sentry will then download and install the updated driver. Restart your laptop, and see if it can now detect the WiFi network.
5. Modify WiFi Adapter Property
Disabling the "allow the computer to turn off this device to save power" option can sometimes fix the "laptop not finding WiFi" problem. Here's how:
-Open the "Device Manager" again.
-Expand the "Network adapters" section.
-Right-click on your WiFi adapter and select "Properties".
-Go to the "Power Management" tab.
-Deselect the checkbox labeled "Allow the computer to turn off this device to save power".
-Click "OK" and then reboot your laptop.
6. Other Potential Fixes
If your "laptop not finding WiFi" issue persists after trying the above methods, you can try these additional fixes:
-Check the Wi-Fi channel: Sometimes, the WiFi channel your router is using can cause interference. You can try changing the channel on your router. The process for doing this varies depending on your router model, but usually, you can access your router's settings by typing its IP address into a web browser.
-Turn on network discovery: This allows your laptop to find other devices and networks on your local area network. You can usually turn it on in the "Network & Internet" settings.
-Activate DHCP: DHCP (Dynamic Host Configuration Protocol) assigns IP addresses to devices on your network automatically. Make sure it's enabled on your router.
-Change the DHCP users's number: Some routers have a limit on the number of devices that can connect via DHCP. You can try increasing this number.
-Restart your modem and wireless router: Unplug both devices from the power source, wait for about 30 seconds, and then plug them back in. This can often fix network-related glitches.
-Change SSID & password on your WiFi router: Sometimes, changing the name (SSID) and password of your WiFi network can solve connection issues.
-Log out and log back in: Log out of your Windows account temporarily and then log back in. This can refresh your network settings.
-Try a different frequency band: If your router supports both 2.4 GHz and 5 GHz bands, try connecting to the other band.
Conclusion
A laptop not detecting WiFi can be a real pain, but with these steps, you should be able to get your laptop connected to the WiFi network again. And remember, PcGoGo Driver Sentry can be a great help in keeping your drivers up-to-date and preventing future WiFi connection issues. If you've tried all these methods and still can't fix the "laptop not detecting WiFi" issue, it might be time to seek further technical assistance.