



Many Windows 10 users may encounter error code 0xc19001e1 when attempting to update or install the system. This article will introduce several effective solutions to help you resolve this error and ensure smooth Windows 10 updates and installations.
1. Update Device Drivers
Outdated or corrupted drivers are one of the common causes of error code 0xc19001e1 during Windows 10 updates or installations. It is recommended to use Driver Sentry to automatically detect and update drivers, saving time and effort while avoiding the risk of downloading or installing incorrect drivers.
Click the download button to get the latest version of Driver Sentry. After installation, open the software and click "Scan".
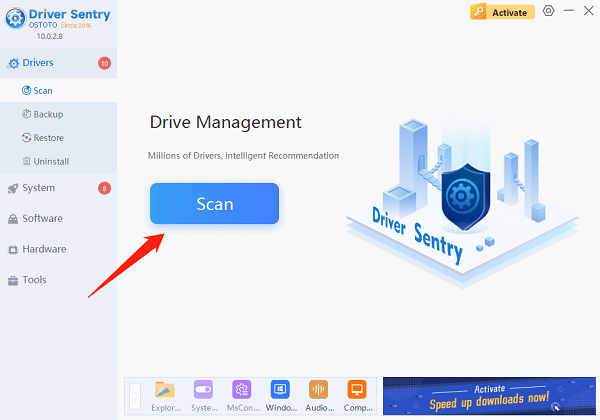
Once the scan is complete, the software will show which drivers are missing or need updating. Find the driver to be updated and click the "Upgrade" button.
After updating, it is recommended to restart your computer to ensure that the updated drivers take effect properly.
2. Check Disk Space
Open "This PC" or "File Explorer".
Check the available space on the system drive (usually the C drive). If space is low, delete unnecessary files or move some files to an external storage device.
To delete temporary files:
Press Win + R, type "temp", and press Enter.
Delete all temporary files in the folder that opens.
3. Check System File Integrity
Search for "Command Prompt" and choose "Run as Administrator".
In the Command Prompt window, type the following command: sfc /scannow
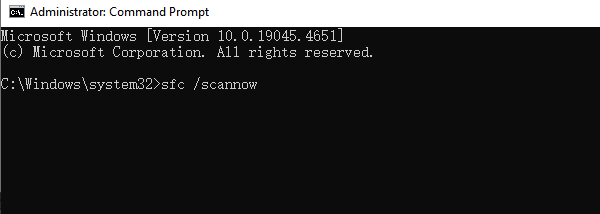
Press Enter, and the system will begin scanning and repairing corrupted files. This process may take a few minutes, so please be patient.
Once the scan is complete, restart your computer and check if the update works properly.
4. Perform a Clean Boot
Press Win + R, type "msconfig", and press Enter.
In the System Configuration window, select the General tab, and check "Selective Startup".
Uncheck "Load startup" items, then go to the "Services" tab.
Check "Hide all Microsoft services", then click "Disable all".
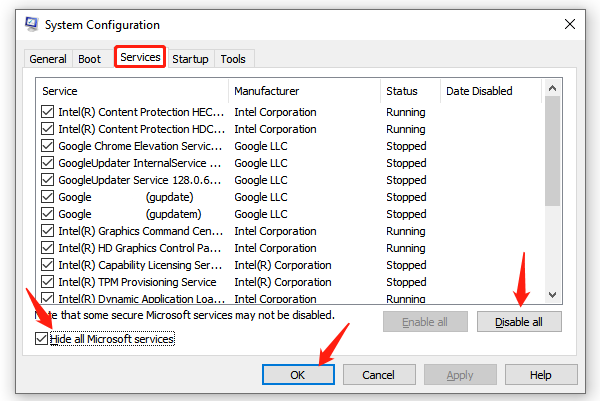
Click "Apply" and restart your computer.
In clean boot mode, try running Windows Update again and check if the issue is resolved.
5. Run Windows Update Troubleshooter
Click the Start button, then select "Settings".
In the settings window, choose "Update & Security".
From the left menu, select "Troubleshoot".
Click "Additional troubleshooters", then select "Windows Update".
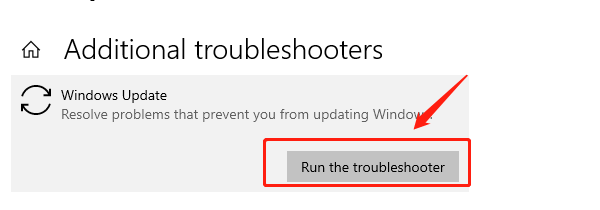
Click "Run the troubleshooter", and the system will automatically detect and fix update-related issues.
6. Temporarily Disable Antivirus Software
Open your antivirus software interface.
Look for and select the "Disable" or "Stop protection" option.
Restart Windows Update and check if the problem is resolved.
Note: After completing the update, make sure to re-enable the antivirus software to ensure your computer's security.
By following the methods above, you should be able to fix the error code 0xc19001e1 in Windows 10. If the issue persists, it is recommended to contact Microsoft official support or refer to relevant technical forums for further assistance.
See also:
How to Fix Laptop Network Connection Failure
Resolve Network Adapter Missing Issue Windows 10