





If Memory Integrity cannot be turned on in Windows 10, the problem is often caused by incompatible or outdated drivers, corrupted system files, Windows Security issues, or incomplete system updates. You may see the toggle remain disabled or receive a warning that certain drivers are blocking Core Isolation. This guide explains several practical ways to fix Memory Integrity not turning on, including updating drivers with Driver Sentry, removing incompatible drivers, repairing Windows with SFC and DISM, checking registry settings, running a security scan, and installing the latest Windows updates.
1. Check and Remove Incompatible Drivers
Press Win + I to open Settings, then go to "Update & Security" > "Windows Security".
Click "Device Security" > "Core Isolation" > "Memory Integrity".
If you encounter an error stating Memory Integrity cannot be enabled, check if there are any incompatible driver warnings.
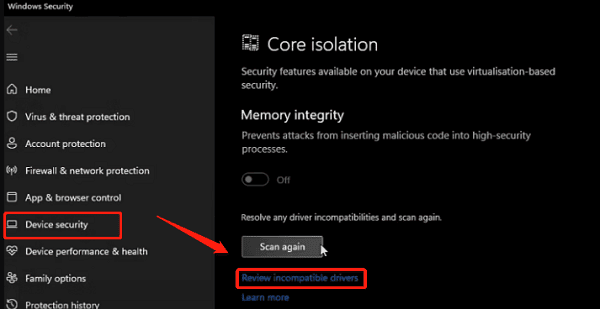
Note down the names of the incompatible drivers and proceed with the following steps:
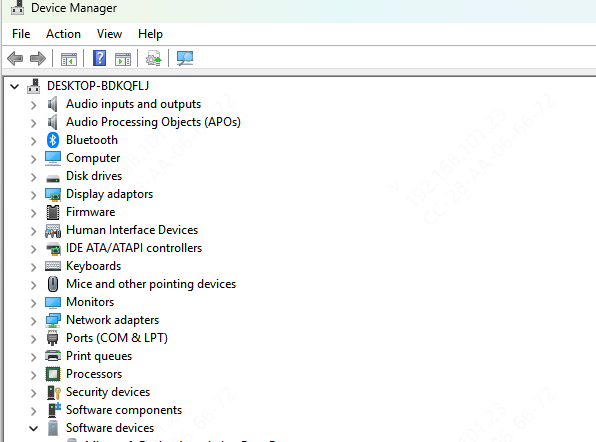
Press Win + X and select "Device Manager".
Locate the problematic driver under the corresponding hardware category (e.g., Display Adapters, Network Adapters).
Right-click the driver, select "Uninstall device", check the option to delete the driver software, and confirm.
Restart your computer and try enabling Memory Integrity again in Windows Security.
2. Force Enable Memory Integrity via Registry Editor
Note: Before editing the registry, it is highly recommended to create a system restore point to avoid potential system issues.
Press Win + R, type "regedit", and press Enter to open the Registry Editor.
Navigate to the following path:
Computer\HKEY_LOCAL_MACHINE\SYSTEM\CurrentControlSet\Control\DeviceGuard\Scenarios\HypervisorEnforcedCodeIntegrity
In the left panel, select the "HypervisorEnforcedCodeIntegrity" folder.
In the right panel, double-click the "Enabled" key.
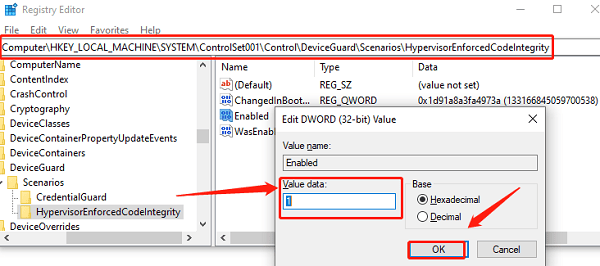
Change the Value Data from "0" to "1", then click "OK" to save changes.
Close the Registry Editor, restart your computer, and try enabling Memory Integrity.
3. Repair System Files
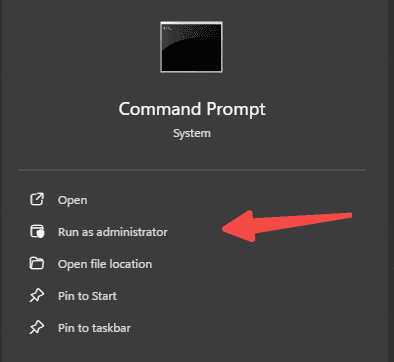
Press Win + S, type "cmd", right-click Command Prompt, and select "Run as administrator".
Enter the following command to scan and repair system files: sfc /scannow
Wait for the process to complete and restart your computer.
If the issue persists, run the following DISM command to repair the Windows image: DISM /Online /Cleanup-Image /RestoreHealth
Restart your computer and try enabling Memory Integrity again.
4. Run Windows Security Scan
Press Win + I to open Settings, go to "Update & Security" > "Windows Security".
Click "Virus & Threat Protection" > "Scan Options".
Select "Microsoft Defender Offline Scan", then click "Scan Now".
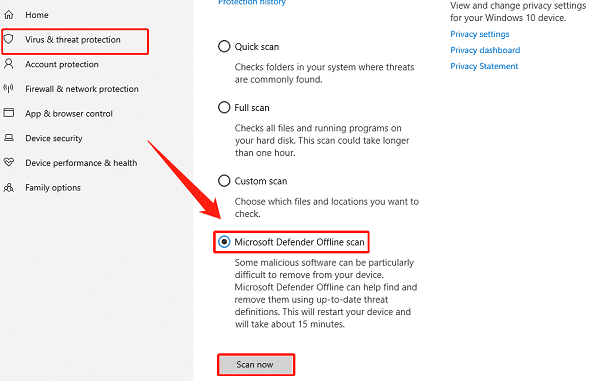
Windows will restart and perform a deep scan to detect and remove any threats.
After the scan completes, try enabling Memory Integrity again.
5. Update Drivers
Outdated or corrupted drivers are one of the most common reasons why Windows fails to enable Memory Integrity. Keeping your drivers up to date can effectively resolve this issue. It is recommended to use Driver Sentry to automatically detect and update drivers, saving time while avoiding incorrect driver installations.
Click the download button to get the latest version of Driver Sentry, install and launch the software. Click "Scan" to detect outdated or missing drivers.
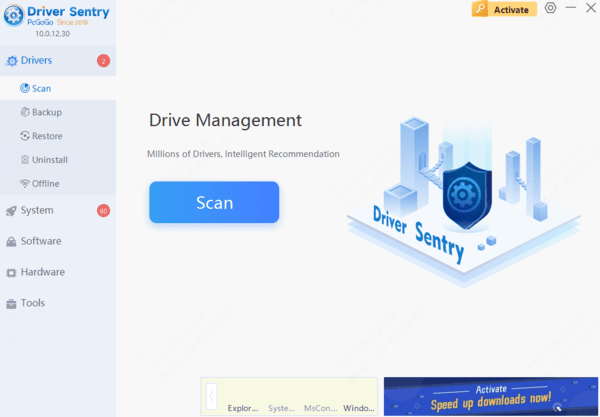
Locate the drivers that need updating in the results list and click "Upgrade".
Restart your computer to apply the updates.
6. Check for Windows Updates
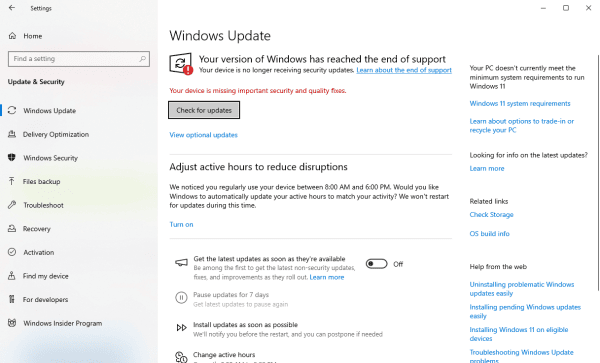
Press Win + I to open Settings, then go to "Update & Security".
Click "Windows Update" and select "Check for updates".
If updates are available, click "Download and install".
Once the updates are installed, restart your computer and try enabling Memory Integrity.
Frequently Asked Questions
What does Memory Integrity do in Windows 10?
Memory Integrity—also called Hypervisor-Protected Code Integrity—uses virtualization-based security to isolate important Windows processes. It helps prevent malicious or untrusted drivers from modifying protected areas of system memory.
Can the registry setting bypass an incompatible driver?
No. Changing the registry value only requests that Windows enable Memory Integrity. It does not make an incompatible driver safe or compatible. Update or remove the blocking driver before attempting to enable the feature again.
Why does an incompatible driver remain after uninstalling its device?
Uninstalling a device may leave its driver package in the Windows Driver Store. Identify the published driver name with pnputil /enum-drivers, then remove only the confirmed package using pnputil /delete-driver oemXX.inf /uninstall. Create a restore point first.
By following these methods, you should be able to successfully enable the Memory Integrity feature on Windows 10, enhancing your system's security. If the issue persists, consider resetting Windows or contacting Microsoft Support for further assistance.