




Windows 11 sleep mode problems can prevent your computer from entering a low-power state, causing unnecessary battery drain and power usage. This issue is often related to outdated drivers, incorrect power settings, hybrid sleep conflicts, fast startup options, or corrupted system files. This guide explains the common causes of Windows 11 sleep mode failures and provides practical solutions to restore normal sleep functionality.
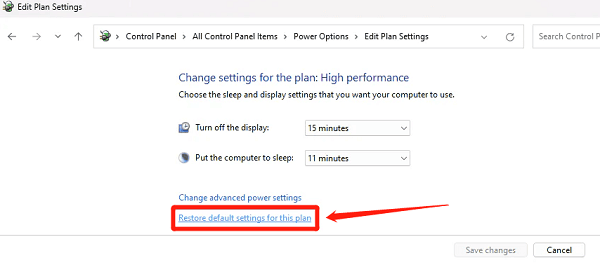
Restore Default Power Plan Settings
Press Windows + S, search for and open "Control Panel".
Navigate to "Hardware and Sound" > "Power Options".
Next to your current power plan, click "Change plan settings".
Select "Restore default settings for this plan" and confirm.
Restart your computer and test sleep mode again.
Enable Sleep Mode in Settings
Press Windows + I to open Settings, then go to "System" > "Power & Battery".
Under "Screen and Sleep", set reasonable times for "On battery power", "put my device to sleep and When plugged in", put my device to sleep.
Save the settings and check if sleep mode works properly.
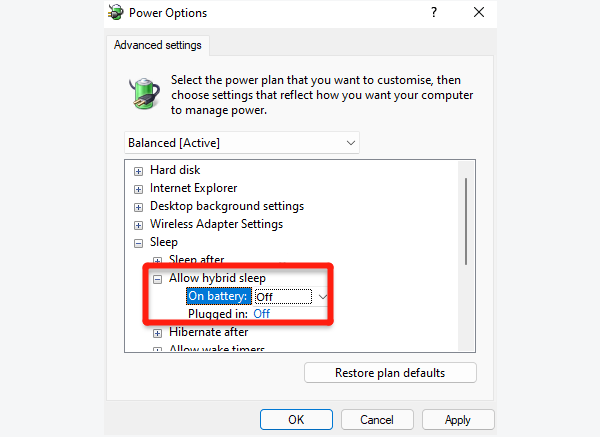
Turn Off Hybrid Sleep Mode
Press Windows + S, search for and open "Control Panel", then go to "Hardware and Sound" > "Power Options".
Next to your active power plan, click "Change plan settings" > "Change advanced power settings".
In the pop-up window, expand "Sleep" > "Allow hybrid sleep" and set both "On battery" and "Plugged in" to Off.
Click "OK" to save changes and restart your computer.
Check Driver Issues
Outdated or incompatible drivers can cause Windows 11 to fail to enter sleep mode. Ensure all your system drivers are up-to-date. Using Driver Sentry is recommended for automatic driver detection and updates, saving time and avoiding errors during download or installation.

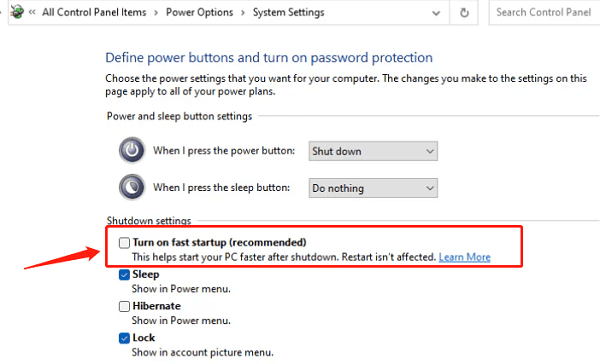
Disable Fast Startup
Open Control Panel, go to "Hardware and Sound" > "Power Options".
Click "Choose what the power buttons do" on the left.
Select "Change settings that are currently unavailable", then uncheck "Turn on fast startup (recommended)".
Repair System Files
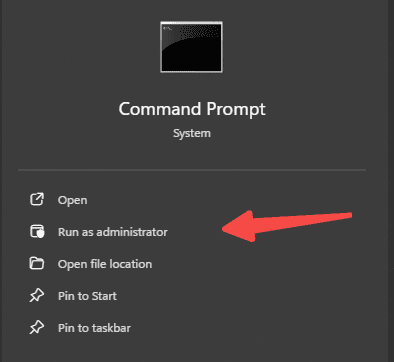
Press Windows + S, search for "Command Prompt", right-click it, and select "Run as administrator".
Type the following command and press Enter: sfc /scannow
Wait for the scan to complete. If corrupted files are found, the system will attempt to repair them automatically.
Restart your computer and test the sleep function.
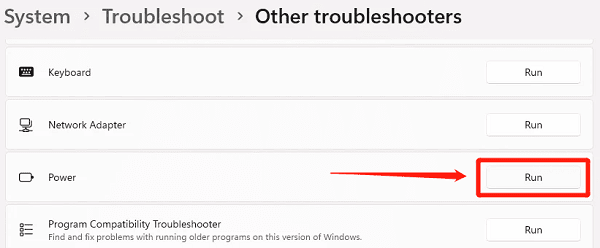
Run the Power Troubleshooter
Press Windows + I to open Settings, then go to "System" > "Troubleshoot".
Click "Other troubleshooters".
Find "Power" in the list and click "Run" next to it.