



Windows 11 users may occasionally experience audio problems, including no sound output, reduced audio quality, or missing audio devices. These issues can be caused by outdated drivers, incorrect settings, disabled services, or system compatibility problems. In this guide, we’ll provide several effective solutions to help you troubleshoot Windows 11 sound issues, restore proper audio functionality, and enjoy a better listening experience.
1. Check Audio Device Connections
Ensure your headphones or speaker plugs are properly inserted into the correct port.
Confirm that Bluetooth devices are connected in Windows 11.
Switch between devices to test if the problem is specific to one audio device.
2. Update Audio Drivers
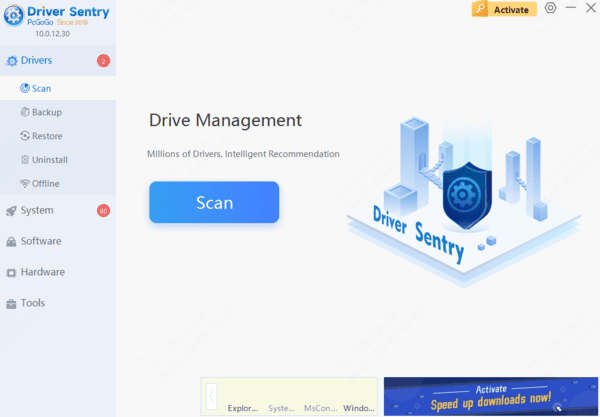
Outdated or corrupted audio drivers are one of the common causes of sound issues in Windows 11. Updating drivers can resolve most audio problems. Using Driver Sentry is recommended for automatic driver updates, saving time and reducing the risk of downloading incorrect drivers.
3. Check Volume Settings
Click the speaker icon on the bottom right of the taskbar and ensure the volume slider is raised and there is no mute symbol.
Right-click the speaker icon on the taskbar, select "Open Volume Mixer", and check if the volume for all apps is turned up. If any app is muted or has low volume, adjust it.
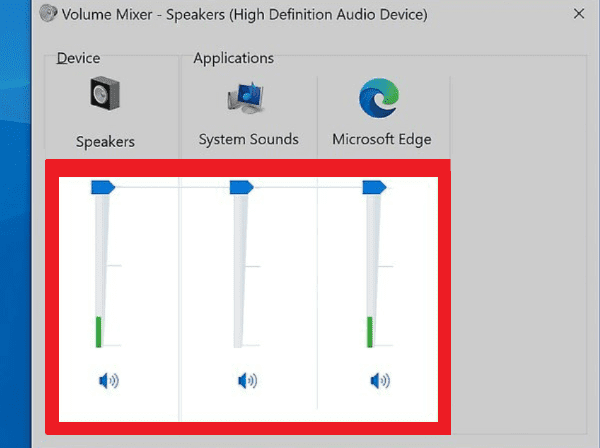
Right-click the speaker icon, select "Sound Settings", and ensure the correct audio output device is selected. If multiple devices are connected, confirm that the correct one is in use.
4. Reset Audio Settings
Press Win + I to open Windows settings and select "System".
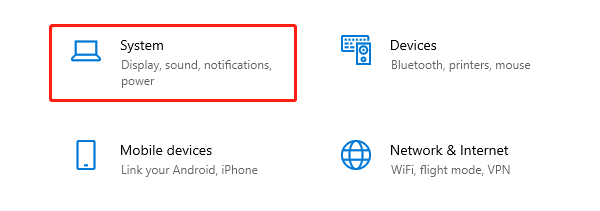
In the "System" menu, choose "Sound".
Under "Advanced Sound Options", click "App volume and device preferences", then reset all audio devices to default.
Test the audio by playing music or video to check if the sound is working correctly.
5. Run the Audio Troubleshooter
Press Win + I to open the settings menu.
In "Update & Security", click "Troubleshoot" on the left side.
Click "Additional troubleshooters", then find "Playing Audio" and click "Run the troubleshooter".
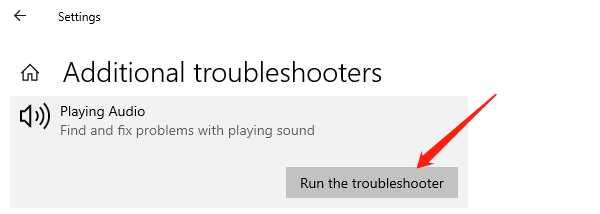
The tool will automatically detect and fix any audio problems. Follow the prompts and retest your audio after the troubleshooting process.
6. Restart Audio Services
Press Win + R to open the "Run" dialog box, type "services.msc", and press Enter.
Scroll down the list of services to find "Windows Audio".
Right-click "Windows Audio" and choose "Restart". If the service is not running, click "Start".
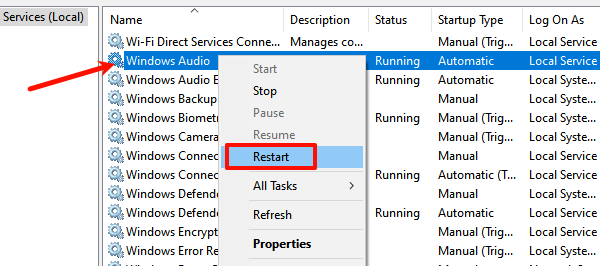
Ensure that the "Windows Audio Endpoint Builder" service is also running. If it isn't, start the service.
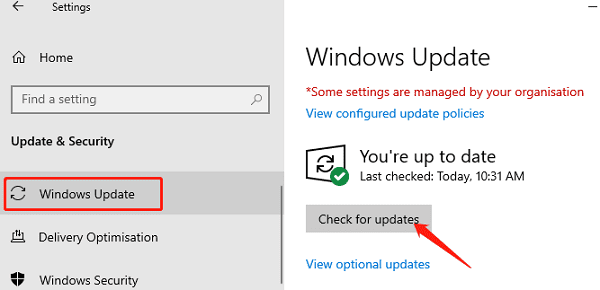
7. Check for System Updates
Press Win + I to open settings.
In the "Update & Security" menu, click "Windows Update".
Click "Check for updates" to see if any system updates are available.