




Seeing "No Audio Output Device Is Installed" in Windows 10 usually means the system can no longer recognize or properly communicate with your speakers, headphones, or built-in audio hardware. The issue may appear after a Windows update, driver failure, configuration change, or disabled audio component. This guide walks through the main ways to restore sound, including repairing or updating Realtek and Intel audio drivers with Driver Sentry, restarting Windows audio services, enabling hidden playback devices, reinstalling drivers, running the built-in audio troubleshooter, checking BIOS audio settings, and installing available Windows updates.
Restart Windows Audio Services
If the driver is installed correctly but sound still does not work, Windows audio services may not be running properly.
Steps to Restart Audio Services:
Press Windows + R, type "services.msc", and press Enter.
Locate Windows Audio, right-click it and select "Restart".
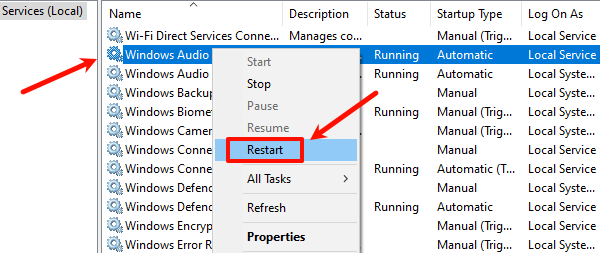
Do the same for "Windows Audio Endpoint Builder".
Close the Services window and test your sound.
Show Disabled Audio Devices
Sometimes the audio device is installed but disabled by default.
Enable Hidden Audio Devices:
Right-click the speaker icon in the taskbar.
Select "Sounds", go to the "Playback" tab.
Right-click anywhere inside the window, enable "Show Disabled Devices" and "Show Disconnected Devices".

If an audio device appears, right-click it and select "Enable".
Set it as the Default Device.
Update Audio Drivers
Audio problems on Windows 10 are most often caused by incorrect Realtek, Intel, or manufacturer-specific sound drivers. Using Driver Sentry ensures the correct driver is installed automatically, avoiding compatibility issues.

Download and Install:
Click the "Download" button to download the software package.
Ensure the installation is completed with administrator privileges.
Run Scan:
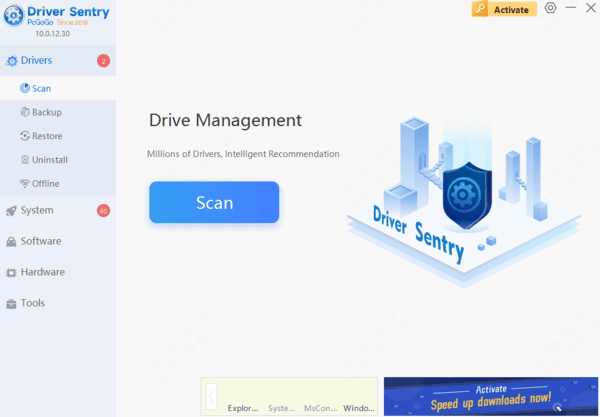
Once opened, the program will automatically detect your system hardware, and you can also click the "Scan" button.
Driver Sentry scans your PC for missing, outdated, corrupted, or incompatible drivers, including audio devices.
Execute Update:
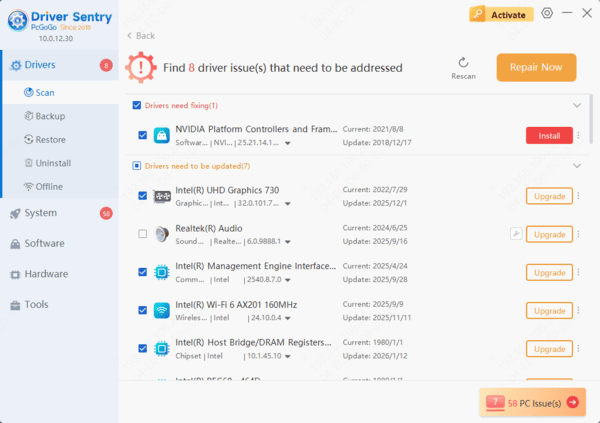
This may appear as Realtek High Definition Audio, Intel Smart Sound Technology, or a manufacturer-specific driver in the driver list.
Click the "Upgrade" next to the audio driver item. Driver Sentry downloads the most stable and compatible driver for your exact system configuration.
Restart your computer:
Rebooting is essential for the new audio driver to take effect.
After restarting, check the speaker icon in the system tray. In most cases, the "No Audio Output Device Is Installed" error will be resolved at this point.
Reinstall Audio Driver
Steps to Reinstall the Audio Driver:
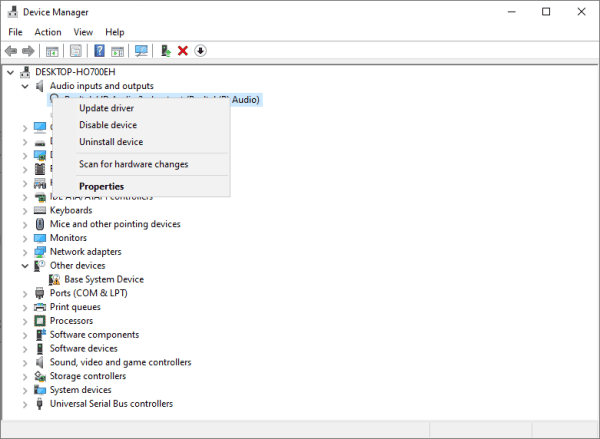
Press Windows + X and select Device Manager.
Expand "Sound, video and game controllers", right-click your audio device and select "Uninstall device".
Check "Delete the driver software for this device" if available, click "Uninstall".
Restart your PC.
Windows will automatically reinstall the default audio driver.
For best compatibility, follow up by updating the driver again using Driver Sentry.
Run Windows Audio Troubleshooter
Windows 10 includes a built-in troubleshooter that can automatically detect configuration issues.
How to Run the Troubleshooter:
Open Settings
Go to "Update & Security", select "Troubleshoot".
Click "Additional troubleshooters"
Choose "Playing Audio", click "Run the troubleshooter".
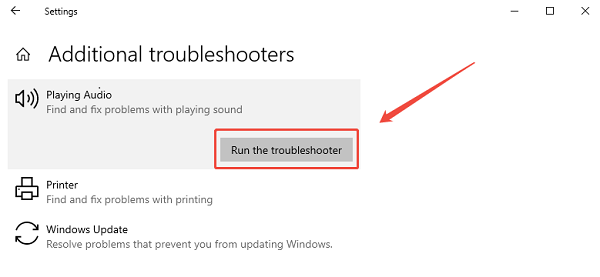
Follow the on-screen instructions.
Check BIOS Audio Settings
In rare cases, onboard audio may be disabled in BIOS.
Steps to Verify BIOS Audio:
Restart your PC.
Enter BIOS/UEFI (usually by pressing F2, DEL, or F10).
Locate "Integrated Peripherals" or "Advanced Settings, ensure "Onboard Audio" or "HD Audio" is set to "Enabled".

Save changes and exit BIOS.
Update Windows
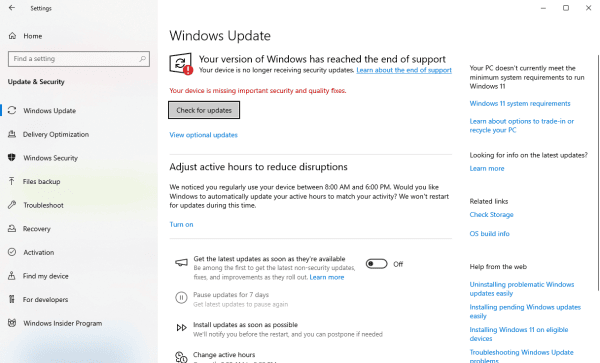
Open Settings.
Go to "Update & Security" > "Windows Update".
Click "Check for updates".
Install any available updates
Restart your computer.
Final Thoughts
The "No Audio Output Device Is Installed" error in Windows 10 is almost always caused by driver issues. Updating audio drivers with Driver Sentry is the fastest and most reliable solution, as it ensures full hardware compatibility and stability. If the problem persists, Windows audio services, device settings, and BIOS configurations should be checked step by step.