

Learn how to update ASUS motherboard drivers with 3 reliable methods — using Windows Device Manager, downloading manually from the ASUS support site, and automatically scanning and installing with Driver Sentry — to keep your system stable, compatible, and performing at its best.
Tips for Ensuring Successful Driver Updates
Create a System Restore Point
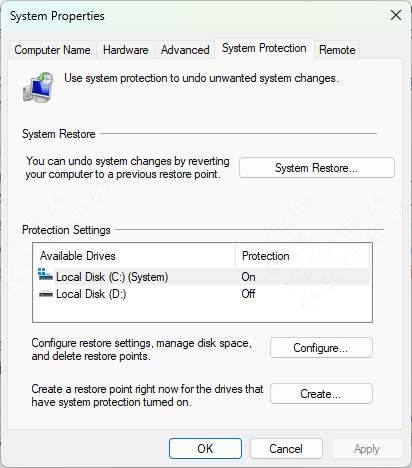
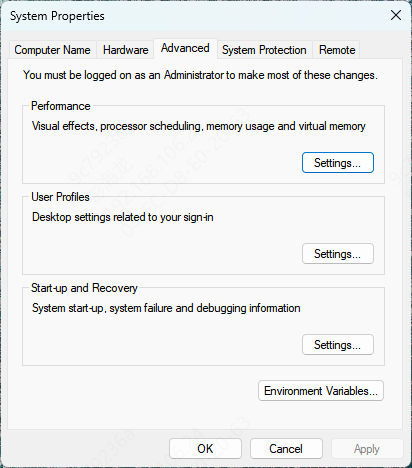
Before updating drivers, it's always a good idea to create a System Restore Point. This way, if anything goes wrong during the update, you can restore your system to its previous state. To do this:
Type Create a restore point in the search bar and open the System Properties window
Click on Create, name your restore point, and click Create again
Check for BIOS Compatibility
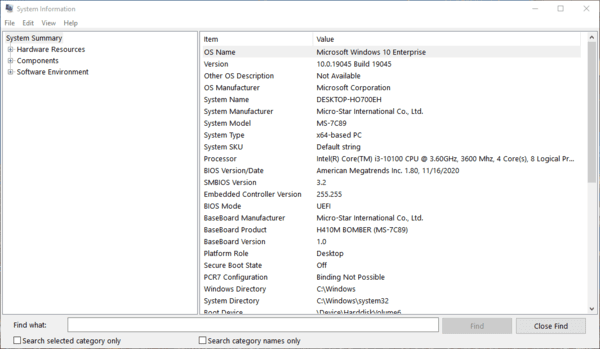
Before updating motherboard drivers, ensure your BIOS is up to date. BIOS and driver updates often go hand in hand to ensure full compatibility with new hardware
You can check your BIOS version in the BIOS settings or use the ASUS support website to see if any BIOS updates are available
Method 1: Update Drivers via Windows Device Manager
Updating drivers manually through Device Manager is simple:
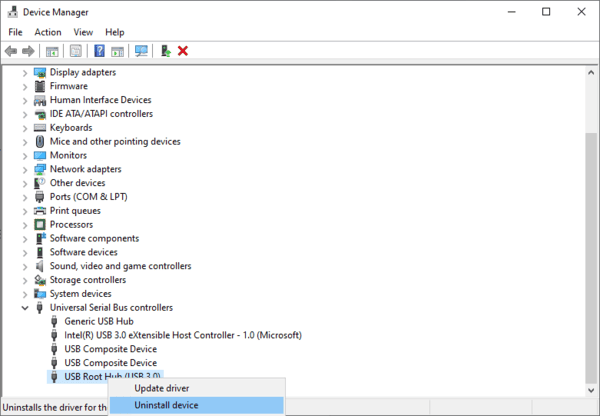
Open Device Manager and find the driver that needs updating (e.g., chipset or audio driver)
Right-click on the device and select Update driver
Choose Search automatically for updated driver software
If an update is available, Windows will download and install it automatically

Method 2: Update Drivers Using ASUS Support Website
Here's how to manually download and install the latest drivers:
Go to the ASUS support website and enter your motherboard model
In the Drivers & Tools section, select the correct operating system (e.g., Windows 10 or Windows 11)
Download the latest driver package for the desired component (e.g., chipset or audio driver)
Extract the files and follow the on-screen instructions to install the drivers

Method 3: Use Automated Driver Update Tools
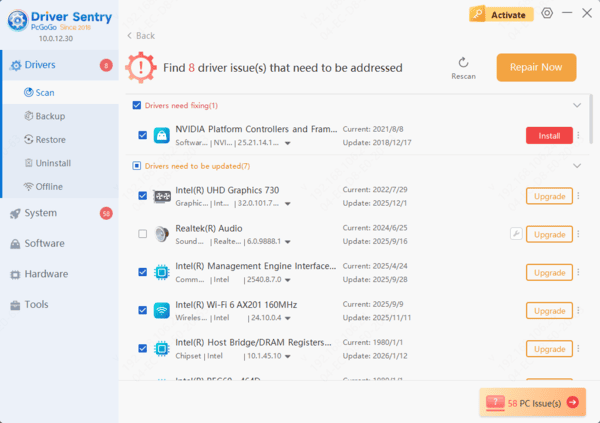
Tools like Driver Sentry can automatically scan for outdated drivers, download the correct versions, and install them with just a few clicks:
Download Driver Sentry: Go to the official website and download the software
Run the Scan: Open the software and click on Scan to detect outdated or missing drivers
Update Drivers: After the scan is complete, select the drivers that need to be updated and click Repair Now to install the latest drivers
Reboot the System: Once the updates are installed, restart your system to apply the changes
How to Fix Issues After a Driver Update
If your system starts having issues after updating a driver, try:
Rolling back the driver: In Device Manager, right-click on the device, select Properties, and click on the Driver tab to roll back to the previous driver
Uninstalling the driver: If rolling back doesn't work, uninstall the problematic driver and reinstall it from a reliable source
Reverting to Previous Driver Versions
In case a new driver causes issues, you can revert to a previous driver:
Open Device Manager, right-click the problematic device, and select Properties
Go to the Driver tab and click on Roll Back Driver
Conclusion
Updating your ASUS motherboard drivers is essential to keeping your system running smoothly, improving hardware compatibility, and fixing bugs. By following the methods outlined above, you can ensure that your drivers are always up to date, allowing your system to perform at its peak. Whether you prefer manually checking for updates or using automated tools like Driver Sentry, keeping your motherboard drivers up to date is a key step in maintaining system performance and stability.
