



Windows 11 users may occasionally encounter audio problems, such as no sound, missing audio devices, or unexpected sound interruptions. These issues can be caused by outdated drivers, incorrect audio settings, disabled services, or system conflicts. In this guide, we'll provide practical solutions to help you troubleshoot Windows 11 audio issues, restore sound functionality, and enjoy a smooth audio experience again.
1. Check for Driver Updates
Outdated or corrupted drivers can cause audio issues in Windows 11. Updating your audio drivers can effectively resolve this problem. Using Driver Sentry for automatic driver detection and updates is recommended, as it saves time and avoids incorrect driver installations.
Download the latest version of Driver Sentry, install it, and open the software. Click "Scan".
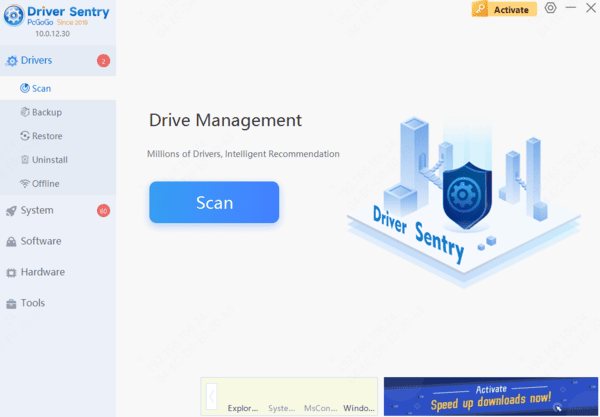
After the scan, review the list of drivers that need updates or installations. Locate the audio driver and click "Upgrade".
Restart your computer after the update to ensure the changes take effect.
2. Check Audio Device Connections
For wired headphones or speakers, ensure the plug is securely connected to the audio port.
For USB audio devices, confirm the plug is properly inserted into the USB port.
Test the audio device by connecting it to a different port on the computer.
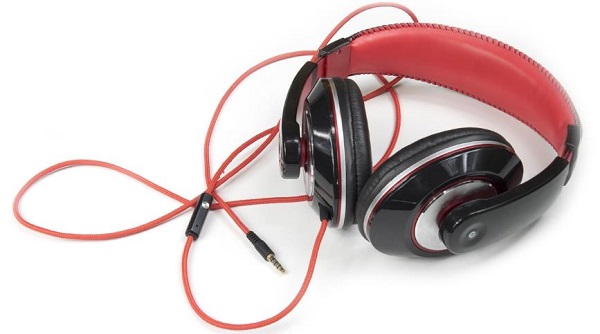
For Bluetooth devices, ensure they are properly paired and show as "Connected".
Verify that the device is enabled and recognized in "Settings" > "Bluetooth & other devices".
3. Restart Your Device
Press Win + X, select "Shut down or sign out", and choose "Restart".
After the system fully restarts, test the audio device.
If the issue persists:
Disconnect and reconnect the audio device.
Restart external audio devices, if applicable.
4. Check Volume Levels
Press the Windows + I keys simultaneously to open Settings, then click "System" > "Sound".
Scroll down to the "Output" section and ensure the "Volume" is not muted.
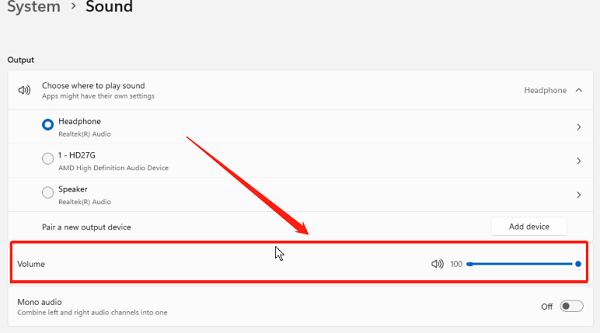
Right-click the volume icon, select "Sound settings", and choose the correct audio output device.
Test the audio output to ensure volume adjustments are effective.
Open "Control Panel" > "Sound", right-click the audio device in the "Playback" tab, and select "Test" to check for output.
5. Restart Audio Services
Press Win + R, type "services.msc", and press Enter to open the Services Manager.
Find "Windows Audio", right-click, and select "Restart".
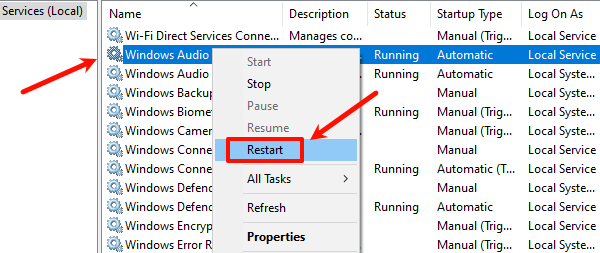
Ensure the following dependent services are also running:
Windows Audio Endpoint Builder
Remote Procedure Call (RPC)
If any of these services are not running, right-click them and choose "Start".
After restarting the services, check if the audio works.
6. Run the Audio Troubleshooter
Go to "Settings" > "System" > "Troubleshoot".
Click "Other troubleshooters", find "Audio", and select "Run".
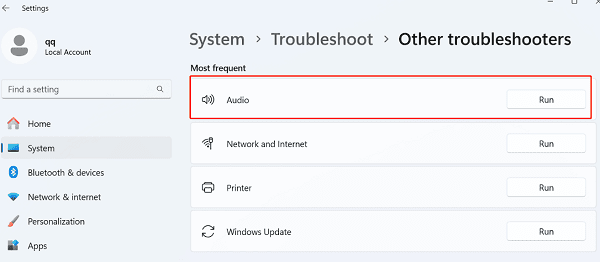
Follow the on-screen instructions to complete the diagnostic process.
If issues are detected, apply the recommended fixes.
Restart your computer and test the audio.
7. Update the Operating System
Navigate to "Settings" > "Update & Security" > "Windows Update".
Click "Check for updates" to see if any are available.
If updates are found, click "Install now" and wait for the process to complete.
Restart your system when prompted to finalize the updates.
Test the audio function after updating.