

Acer monitors are widely respected for their quality and reliable display performance, but users can sometimes run into the frustrating "No Signal" error. This issue can occur on any Windows PC, whether it's a desktop, laptop, or gaming rig. A "No Signal" message typically means the monitor isn't receiving input from the PC, though the causes can range from simple cable problems and incorrect input settings to outdated graphics drivers or hardware issues. This guide provides step-by-step instructions to restore your Acer monitor's signal and ensure long-term display reliability.
Step 1: Check Physical Connections
Start with the simplest potential causes:
Verify the Cable Connections
Ensure the HDMI, DisplayPort (DP), VGA, or DVI cable is firmly connected to both the monitor and the PC
Loose connections often cause intermittent "No Signal" errors
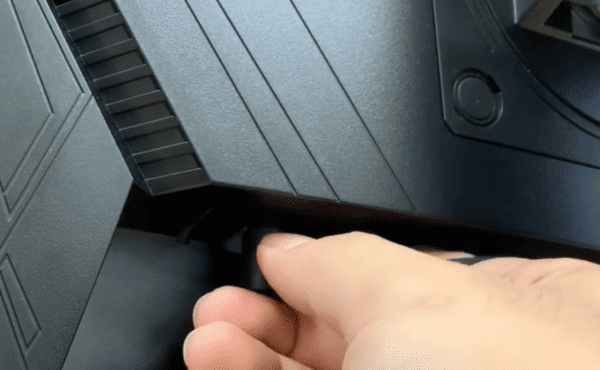
Try a Different Cable or Port
A faulty cable or port can prevent the monitor from detecting the signal
Swap the cable or use a different port on both the PC and monitor
Power Supply Check
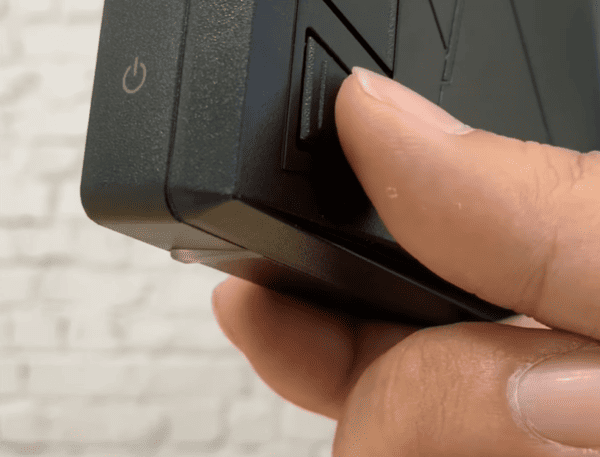
Confirm the monitor is powered on. Check the LED indicator on the monitor
Use the monitor's on-screen menu to ensure it responds, which confirms the monitor itself is functional
Step 2: Verify Input Source
Monitors with multiple input options can show "No Signal" if the wrong input is selected:
Press the Input/Source button on the monitor
Select the correct input port (HDMI, DP, VGA, or DVI) connected to your PC
Some monitors automatically detect the active input, but manually selecting the correct port ensures signal detection

Step 3: Test with Another Device
Testing both the PC and monitor separately helps identify which component is causing the problem:
Connect the Acer monitor to another PC or laptop. If it works, the issue is likely with your original PC
Connect a different monitor to your original PC. If it works, the issue may be with the Acer monitor itself
Step 4: Update Graphics Drivers
Outdated, missing, or corrupted graphics drivers are a common cause of "No Signal" errors.
Driver Sentry
Download and install Driver Sentry from the official website
Open the application and click Diagnose to scan for outdated or missing drivers, including graphics, USB, and chipset drivers
Click Repair or Update All to automatically install the latest drivers
Restart your PC to apply the updates
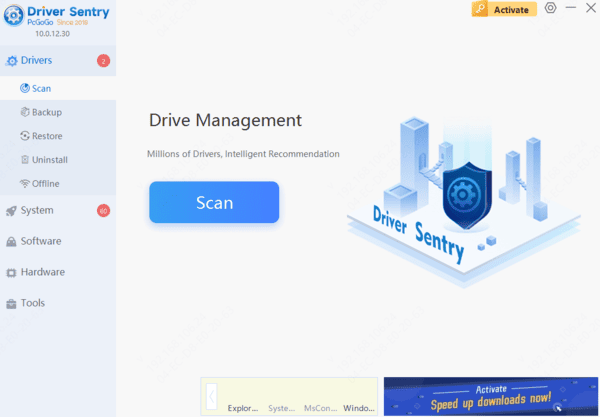
Using Driver Sentry ensures your graphics and related system drivers are fully compatible with your Acer monitor, eliminating driver-related signal issues.
Driver Update Via Device Manager
Press Win + X → Device Manager → Expand Display adapters
Right-click your GPU (Intel, NVIDIA, AMD) → Update driver > Search automatically
Restart your PC

Driver Update Via Acer Website
Go to Acer Support
Download the correct driver

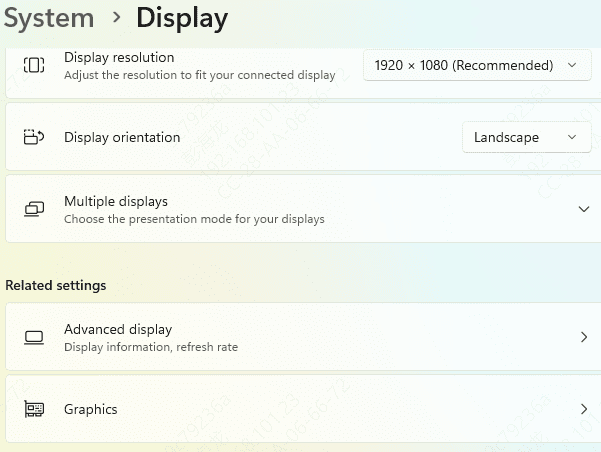
Step 5: Adjust Windows Display Settings
Press Windows + P to open the Project menu
Select Duplicate, Extend, or Second Screen Only depending on your setup
Go to Settings > System > Display > Multiple Displays
Detect connected monitors by clicking Detect
Step 6: Check GPU and Hardware
Ensure GPU is Properly Seated
For desktops, remove and reseat your graphics card
For laptops with integrated and dedicated GPUs, confirm the correct GPU is active in BIOS/UEFI
Inspect Ports for Damage
Bent pins or dust in HDMI, DP, or VGA ports can prevent signal transmission
Clean ports carefully with compressed air
Test Monitor with a Different Device
This helps confirm whether the monitor is functioning or if a hardware replacement is required

Step 7: BIOS/UEFI and Advanced Troubleshooting
If the problem persists after updating drivers and checking connections:
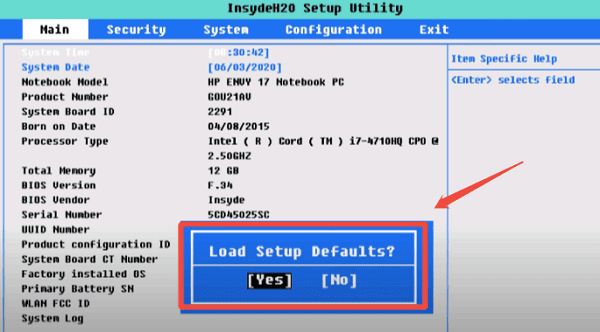
BIOS FIX
Restart your PC and enter BIOS/UEFI (usually F2 or Del key)
Reset BIOS to default settings
Verify video output is enabled for your primary GPU
Save changes and restart
Safe Mode Testing
Boot Windows into Safe Mode
If the monitor works in Safe Mode, uninstall the GPU driver and reinstall using Driver Sentry

System Restore
If the monitor worked previously, restore Windows to an earlier state using Settings > Update & Security > Recovery > Open System Restore

Conclusion
The No Signal issue on Acer monitors is often caused by simple connection problems, incorrect input selection, or outdated drivers. By performing the steps in this guide—including checking cables, verifying input, updating drivers with Driver Sentry, adjusting Windows display settings, and performing BIOS or hardware checks—you can resolve most signal problems without professional repair. Regular maintenance and driver updates help prevent recurring issues, ensuring your Acer monitor delivers consistent, high-quality display performance for work, gaming, or multimedia use.
